Installing Travertine Tile: Step-by-Step Guide for Floors and Walls
Travertine is a versatile natural stone that adds elegance and sophistication to any space. From polished floors to textured walls, travertine tiles are a popular choice for kitchens, bathrooms, living areas, and even outdoor patios. While hiring a professional is always an option, installing travertine tiles yourself can be a rewarding project if you understand the right techniques, tools, and precautions.
This guide provides a complete overview of how to install travertine floor and wall tiles, including preparation, tile selection, cutting, layout, and finishing, so you can achieve professional-looking results.
Choosing the Right Travertine Tile
Before installation, it’s essential to select the correct type of travertine based on your project:
- Tile Size and Thickness: Common sizes include 12×12, 18×18, or 4×8 for kitchens. Floor tiles are usually thicker (10–12 mm) for durability, while wall tiles can be thinner (8–10 mm).
- Finish: Polished tiles offer a glossy look but may be slippery; honed or honed-and-filled tiles provide better traction, especially for bathrooms and high-traffic areas.
- Quality: Inspect tiles for uniform thickness and color. Filling voids is common in honed travertine, and this ensures a smooth installation.
- Natural Variation: Travertine is natural stone, so expect variations in color and veining. Arrange tiles before installation to achieve a balanced look.
Preparing the Surface
Proper preparation is key to a long-lasting travertine installation:
- Clean the Surface: Remove dirt, dust, old adhesive, and grease.
- Level the Floor or Wall: Ensure the surface is flat. Any unevenness may cause tiles to crack or not align correctly.
- Primer (if needed): Some substrates, like drywall for walls or concrete for floors, benefit from a primer or cement backer board to improve adhesion.
- Layout Planning: Measure the area and mark the center. Dry-lay tiles without adhesive to determine the best layout and minimize small cuts at edges.
Tools and Materials Needed
To install travertine tiles, you’ll need the following:
- Tile cutter or wet saw
- Notched trowel
- Tile spacers
- Level
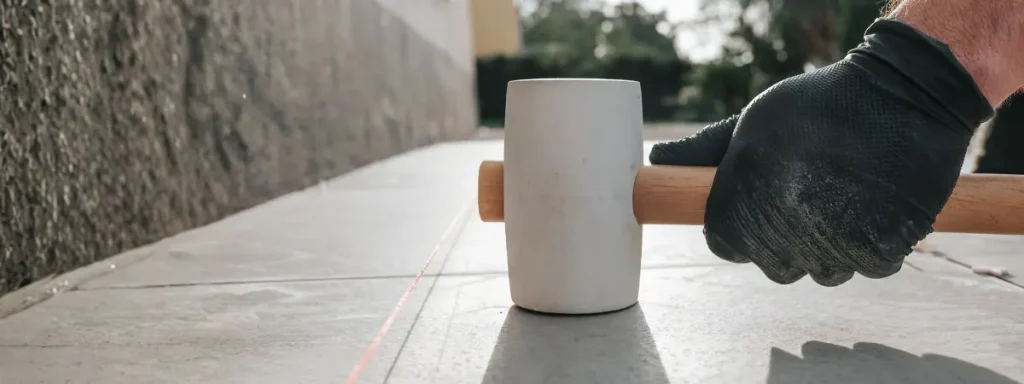
- Rubber mallet
- Grout float
- Mixing bucket and trowel for adhesive
- Epoxy or cement-based adhesive suitable for natural stone
- Sealer (optional, for indoor or outdoor use)
Having all tools ready ensures smoother workflow and reduces mistakes.
Installing Floor or Wall Tiles
Step 1: Apply Adhesive
- Use a notched trowel to spread thin-set adhesive evenly over a small section of the floor or wall.
- Work in small areas to prevent the adhesive from drying before the tiles are set.
Step 2: Set Tiles
- Press each tile firmly into the adhesive.
- Use spacers to maintain even gaps for grout.
- Tap gently with a rubber mallet to ensure good contact.
Step 3: Check Level
- Continuously check that tiles are level with adjacent tiles.
- Make minor adjustments immediately before the adhesive sets.
Step 4: Cutting Tiles
- Use a wet saw to trim tiles to fit edges, corners, or obstacles.
- Smooth rough edges with a sanding stone if needed.
Grouting and Finishing
Once the adhesive has fully set (usually 24–48 hours):
- Remove Spacers: Carefully pull out spacers before grouting.
- Mix Grout: Use a grout compatible with natural stone. Avoid acidic grout.
- Apply Grout: Spread grout over joints using a grout float, pressing into gaps.
- Clean Excess: Wipe the surface with a damp sponge, rinsing often.
- Sealing (Optional but Recommended): Apply a penetrating sealer to enhance stain resistance and longevity.
Tips for a Successful Installation
- Dry Layout First: Always lay out tiles without adhesive first to visualize color and pattern flow.
- Work in Small Sections: Prevent adhesive from drying before placing tiles.
- Consistent Spacing: Tile spacers help maintain straight grout lines.
- Clean As You Go: Remove adhesive spills immediately to prevent staining.
- Use a Level Frequently: Avoid uneven tiles which are noticeable on polished surfaces.
Replacing Travertine Tiles
Sometimes individual tiles need replacement:
- Remove grout around the damaged tile.
- Carefully lift the tile using a chisel and hammer.
- Clean the adhesive from the cavity.
- Apply new thin-set and place the replacement tile.
- Allow adhesive to set, then grout and clean as usual.
This method works for both floors and walls and is easier when the original tiles are honed or honed-and-filled.
FAQ – Travertine Installation
How thick should travertine tile be for floors?
Floor tiles are generally 10–12 mm thick for durability, while wall tiles can be thinner (8–10 mm).
Can I install travertine myself?
Yes, with proper tools, planning, and patience, DIY installation is possible. For large or commercial areas, hiring professionals is recommended.
How much does it cost to install travertine tile?
Costs vary depending on tile size, finish, and labor rates, but DIY reduces labor expenses significantly.
How do I replace a broken travertine tile?
Remove grout, lift the damaged tile, clean the cavity, apply adhesive, place the new tile, then grout and clean.
Do honed and polished travertine require different installation techniques?
No, installation methods are the same, but polished tiles may require extra care to prevent scratches during handling.
Conclusion
Installing travertine tile can transform your space, giving floors and walls a timeless, elegant look. By understanding tile types, finishes, and proper installation methods, you can achieve professional results even as a DIYer. Proper preparation, careful layout, and attention to detail make the difference between a temporary solution and a durable, beautiful surface that lasts for decades.
For those looking for high-quality travertine that combines beauty and ease of installation, Sanaei Stone offers tiles sourced directly from their own quarries in Iran, ensuring consistent quality for floors, walls, and all interior applications.